Dialogflow provides a new and innovative way for users to interact with mobile apps by integrating voice-based conversational interfaces powered by AI.
The conversational platform allows developers to connect with users via the Google Assistant, Amazon Alexa, and other platforms. For the purpose of this post, we will be focusing on using Dialogflow to create your own conversation. A Dialogflow conversation includes how users will invoke the app, the valid things they can say to the assistant, and how the assistant will respond to them.
In this tutorial, you will learn how to create a simple Google Assistant application with one intent with a static response, and learn to test your application on the emulator or your personal device.
By the end of our blog series, we will have finished creating a Google Assistant app that lets you schedule appointments to Clearbridge Mobile’s Sales Team calendar.
1. Sign in to Dialogflow. If you don’t have an account, sign up using your Google account. Note that your Google account will be used to test your app on any of your devices logged in to your account with Google Assistant.
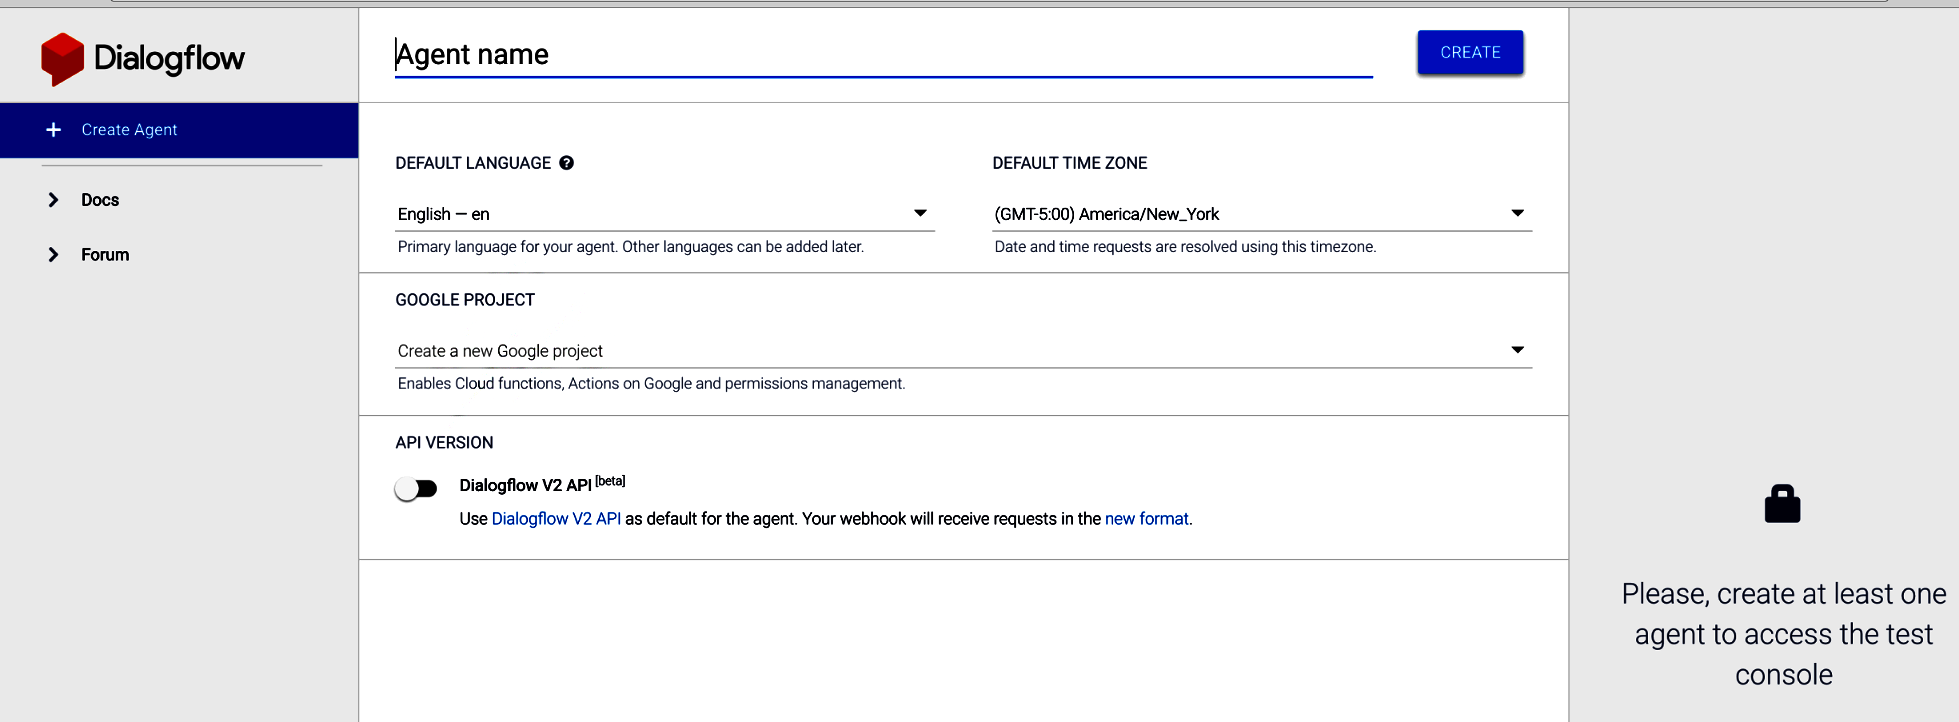
2. Create an agent by clicking “Create Agent” on the top left corner. In our case, we will name our agent “ClearbridgeAppointments”. Since we will be creating this project from scratch, we will use the default values set by Google/Dialogflow. This is where we program and train our app.
3. Next, we will create an intent. An intent maps the user’s command with actions for your app. This is an important part of Dialogflow as this is how users will interact with your app. To create an intent, navigate to “Intents” from the left side menu, then click on “Create Intent”. For the purposes of our appointment application, we will be creating a help intent that helps navigate users through our app. For our help intent, if the user tells the app “I need assistance”, the app will respond by telling the user “You can ask me to book an appointment for you”.
4. Start by giving your intent a name. We will call ours “help”.
5. Then provide sample phrases for your app. These phrases will serve as cues for your application to pick up. Keep in mind, the more phrases your provide, the better your app will be at comprehending your commands (we will demonstrate the power of Dialogflow’s ability to understand phrases below.)
6. Next, we will provide an action name under the “Action” section. This field isn’t required for our basic intent to work, but will be required in the next few blog series when we link our javascript code with our intents.
7. Then, in the “Response” field, write the message that you would like your intent to return to the user.
8. You can see how I created my intent in the screenshot. I have provided 6 phrases that I would like my app to listen for and named my action as “tell.help”. You can also see the default response that I would like my app to return. After filling out all the information, click “Save”. It is not necessary to give your intent an action name when returning static responses. The action name is used to connect our intents with our code later, so it is good practice to name them.
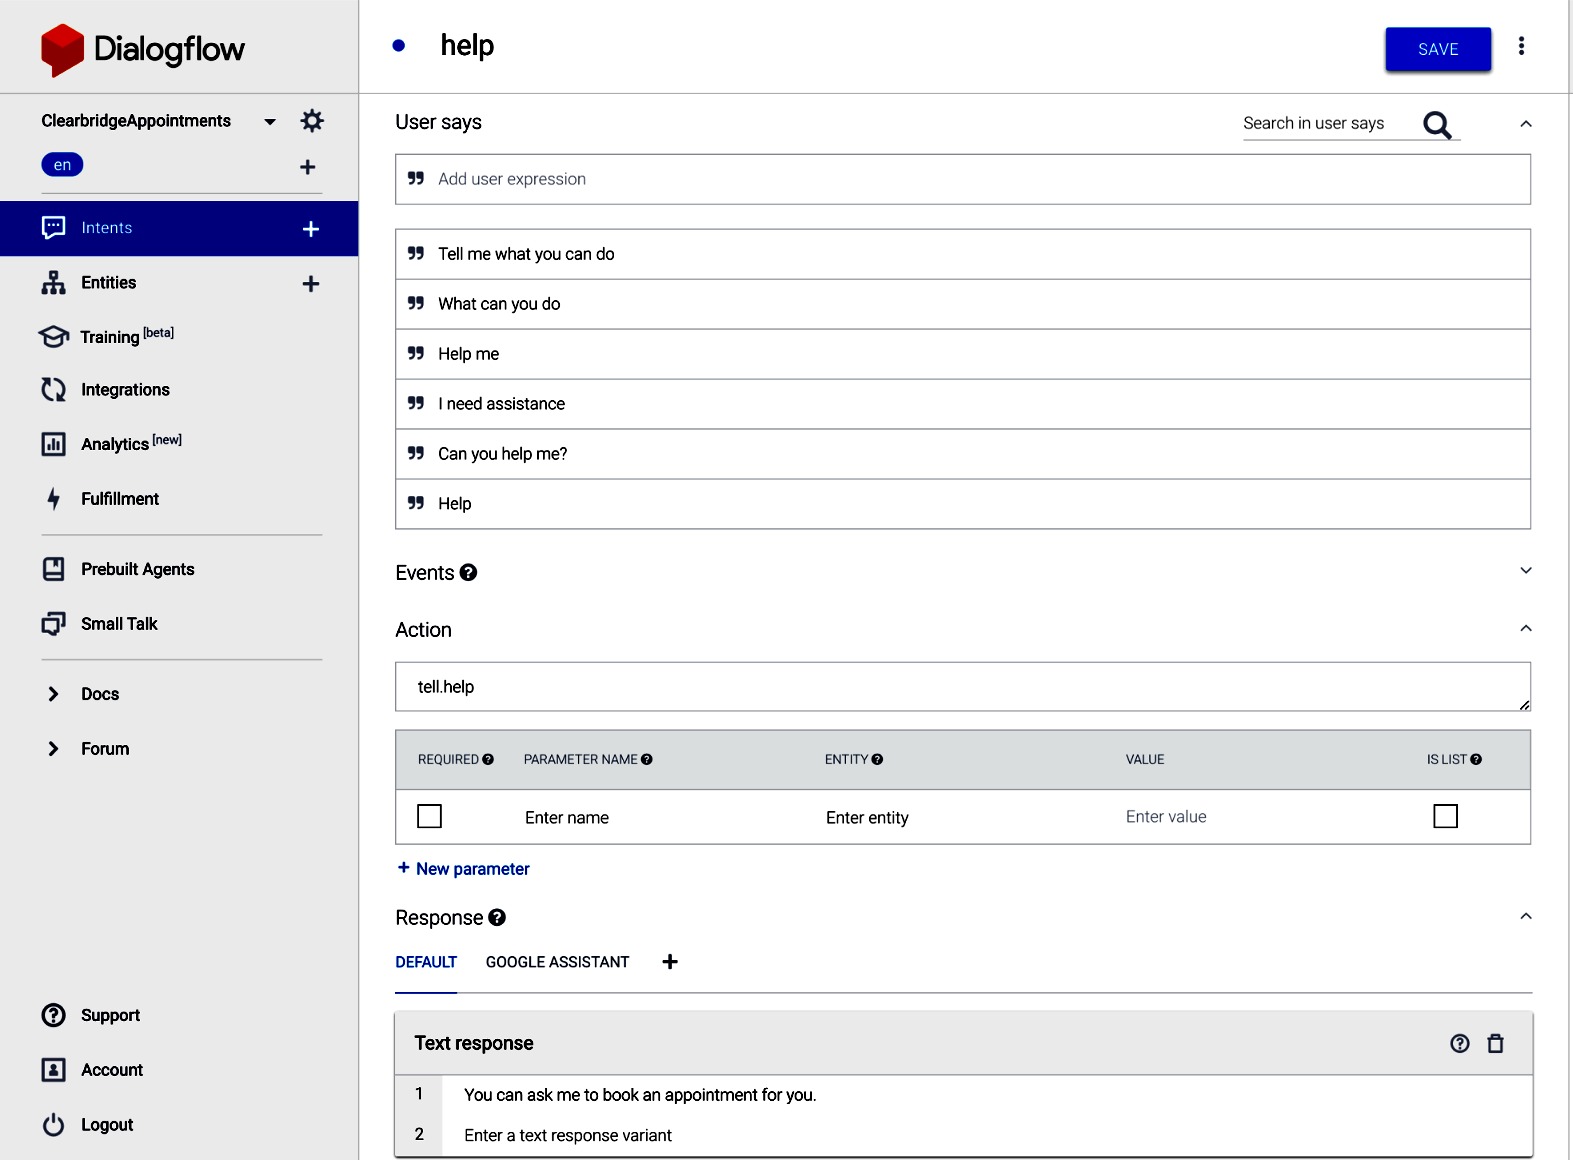
9. Congratulations, you’ve successfully created your first intent! At this point, you might be wondering what the field below “Actions” is about. This section is for entities. Entities are slot-filling input values that you would like to get from the user. These values can be used as variables in your functions when you connect your javascript with the intent. Since our help intent doesn’t require any specific information from the user, I left this section blank for our application. We will cover more details about Entities in the following blog series.
10. Since our app is composed of intents and entities, it’s important to understand the differences between them. As IBM explains, “intents represent verbs (something a user wants to do) and entities represent nouns (such as the object of, or the context for, an action.)”
11. Now that we’ve created our first intent, let’s test our application.
12. There are two ways of testing your application with Dialogflow. The simplest and quickest way of checking that your command is working is by using the built-in test console on the right side of the page. Here, you can type your command, and Dialogflow will return you its response.
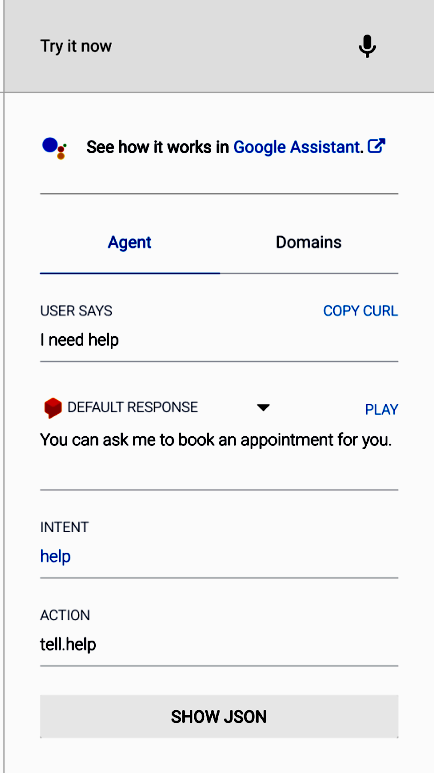
Notice that I told Dialogflow “I need help”, and it triggered our help intent as expected. But something really cool happened here! Notice that the phrase “I need help” was not provided to Dialogflow when I was setting up the intent.
This is the beauty of Dialogflow – it is a machine learning program. Dialogflow will recognize similar phrases and trigger the intents even though you haven’t specified it in the examples. Although the test console is quick and easy to use, the downside of it is that it cannot display images, and other rich displays, which is something that will be covered in the second blog. To remedy this, Dialogflow has another way of testing using the emulator or your device.
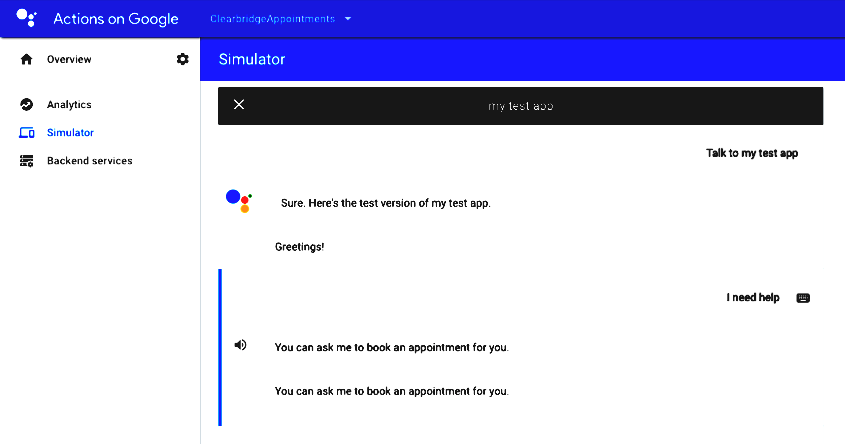
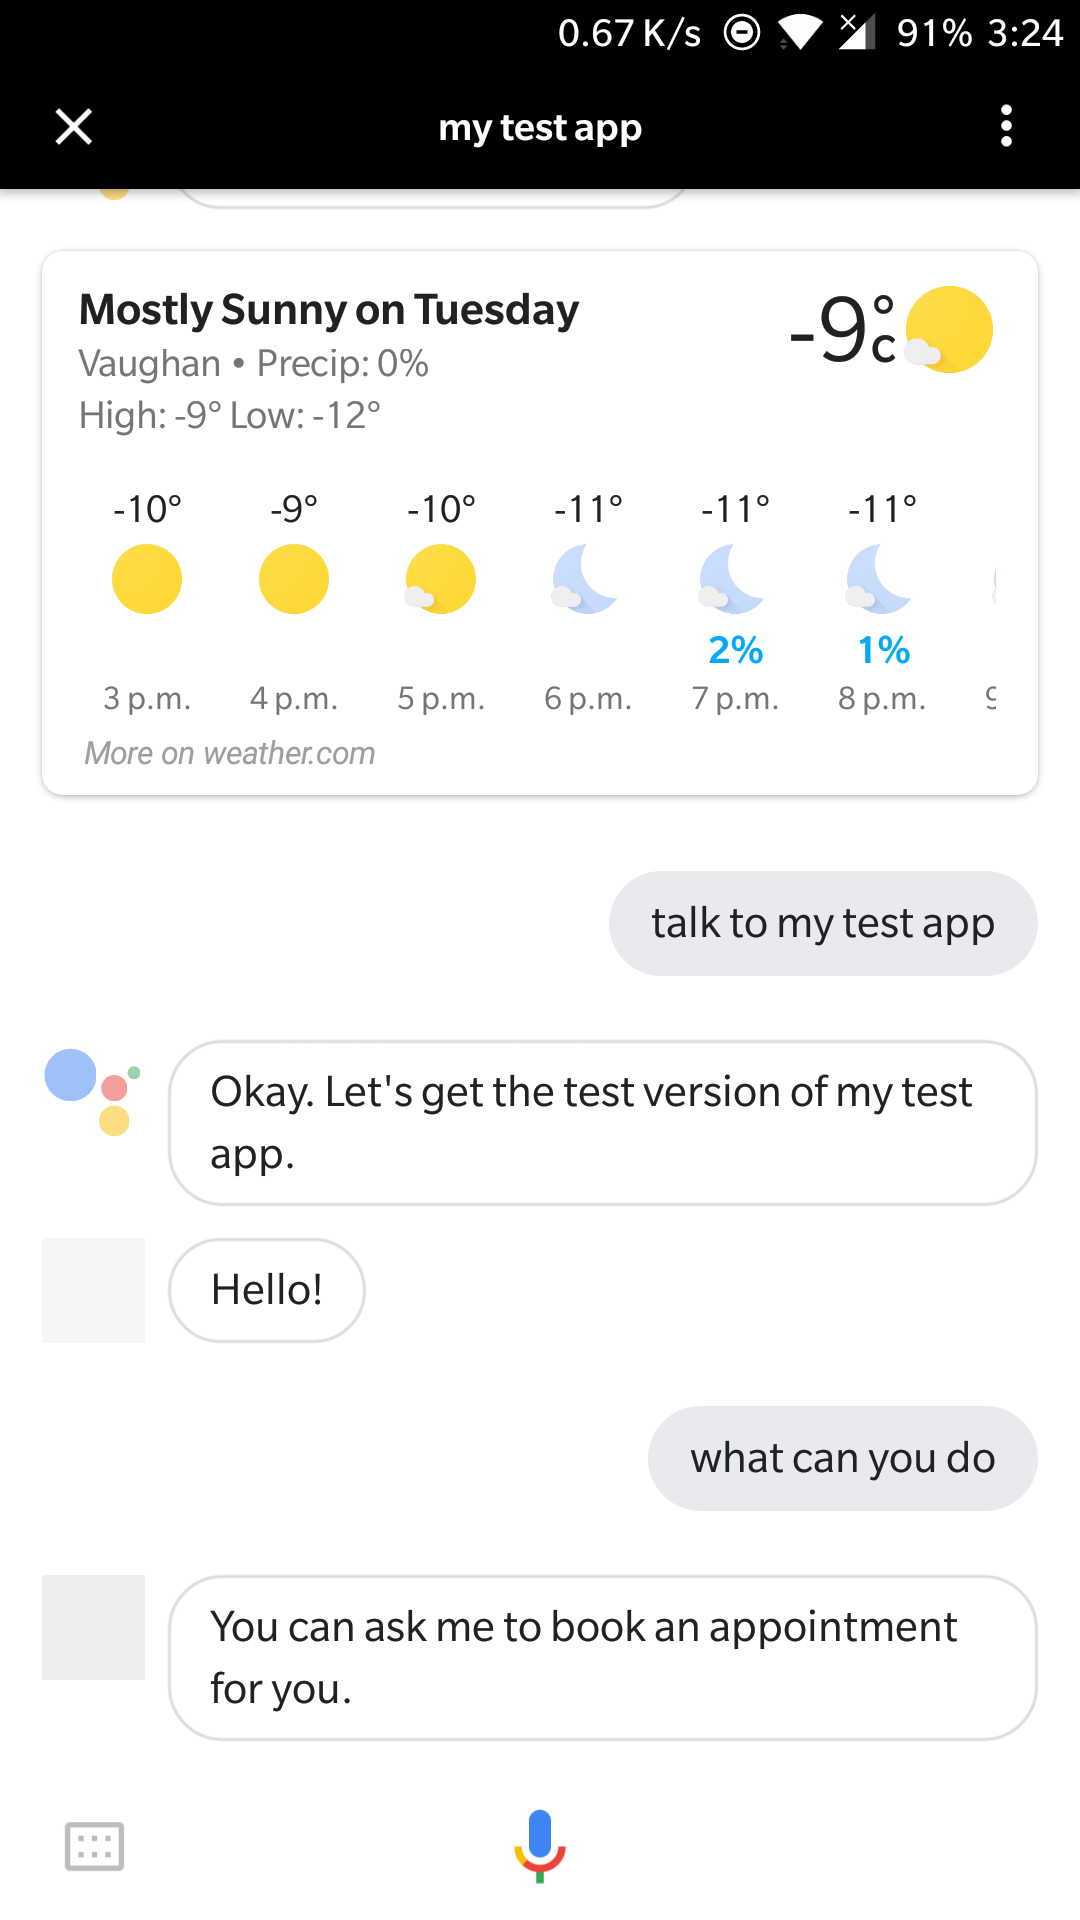
13. To use the emulator, simply navigate to “Integrations” section of the app. Then click “Google Assistant” then “Test”. This will bring up another webpage with an emulator. Start the conversation by entering “Talk to my test app”. This will start our application, and our application will be listening for our command. We can enter “I need help” to our emulator, and it will trigger our “help” intent. Alternatively, we can test our app using our personal devices. Open your Google Assistant on your phone and log in using the account that you used to create this app. Then, say “Talk to my test app”. This will open the test version of our app. We can now trigger our intents by asking the app for help.
Sidenote:
There may be an issue with the simulator where the simulator does not work and returns the message
“My test app isn’t responding right now. Try again soon.”
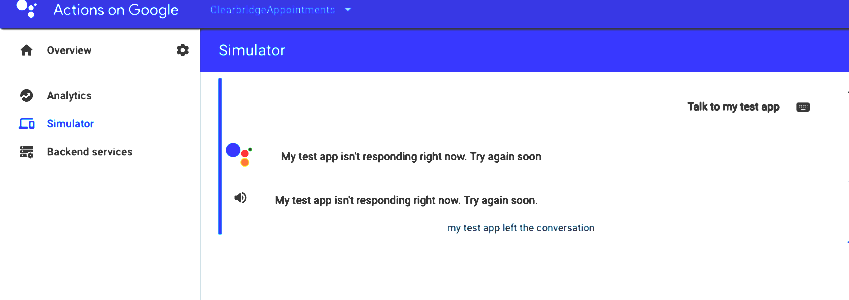
There have been various answers online to fix this bug.
However, the best way that I found getting around this bug is by using a separate testing account to test your application.
Setting Up Your Testing Account
6. Alternatively, after accepting the project invitation on your test account, you can log into your Google Assistant on your mobile device that supports Google Assistant, and invoke your test app by saying “Okay Google, talk to my test app”.
Make sure to tweak your responses to your liking and test your final product. Testing your app is a vital factor of the development process that ensures proper functionality and an overall high-quality product. It’s important to also invite other people to your project so they can test your app before you publish it.
That’s everything for this tutorial! If you’ve made it this far, I want to congratulate you on making your first app with Dialogflow! Intents and Entities are the fundamental building blocks to creating conversational experiences. In our next blog, How to Develop a Google Assistant App: Creating a Fulfillment in Dialogflow we focus on the visual aspect of our application by learning about Fulfillment.
This year we’ll undoubtedly see explosive growth in voice-enabled devices now that Google, Amazon, and other massive brands have made voice development a lot more accessible to developers. There will be a rise of companies leveraging voice-activated apps to provide consumers with the ability to connect directly and more conveniently with the content they want. If you have any questions about Google Actions or voice-enabled apps, feel free to contact us for more information.